Generally, USB debugging is off in the normal state, so you should go to turn it on if necessary, while what USB debugging works for? We can find out that when we connect devices to PC, sometimes it cannot work and the PC screen may ask you to enable debugging mode. Actually, USB debugging mode functions as a developer to allow you to copy data between phones/tablets and computer, install apps on devices with ease, and apply some programs on PC which cooperates with Android devices, like Android Data Recovery, Super Root, Kingo Root, etc.
The approaches of setting up USB debugging depend on the versions of Android OS. That is to say, not all Android phones can be handled in the same way even though they belong to the same model of smartphone.
Part 1:Android 5.0 Lollipop to Android 5.1.1
The recent version of Android OS which is used by Samsung Galaxy S6, HTC One M9 +, etc., requires you to follow a little more steps to fix this issue.
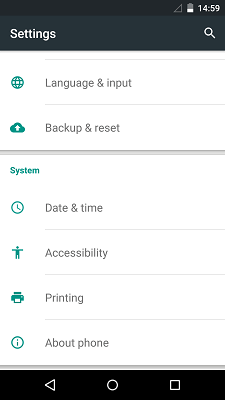
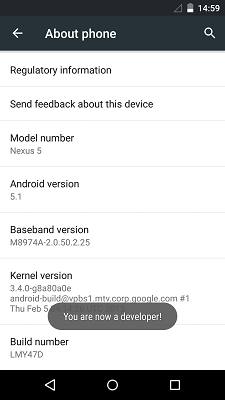
Step 1. Enter Settings. Move your finger to "Settings" > "About Phone" > "Build number" on your Android phone to tap seven times to call for "You are now a developer!"

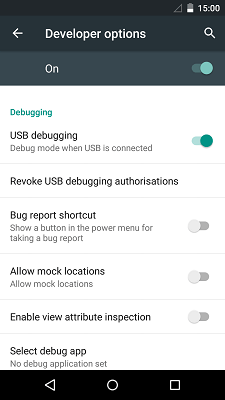
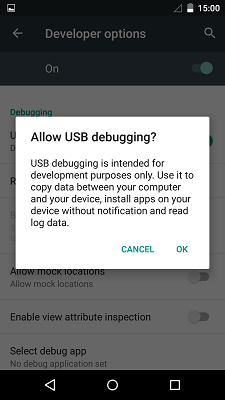
Step 2. Tick . "USB Debugging" It is time to return to "Settings" screen to choose "Developer Options" and then, select "USB Debugging". That is done with pressing "OK" option.
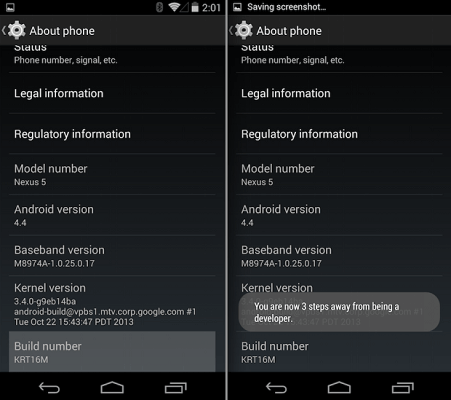
Part 2:Android 4.2 Jelly Bean to Android 4.4.4
The devices running Android 4.2 to 4.4.4 can be enabled USB debugging in the similiar way to Android 5.0 Lollipop.
Step 1. To be a Developer. Find out "Settings" option and tap it. Then, move to "About phone" and scroll down to tap "Build number" for 7 times to gain a signal telling "You are under developer mode!"
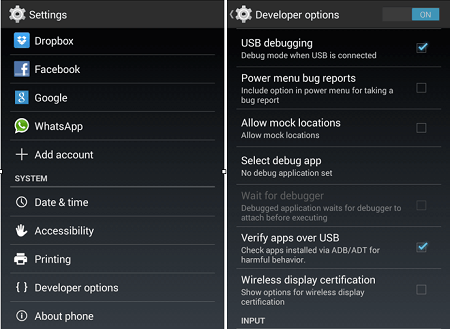
Step 2. Set up USB debuggingAt this point, tap "Settings" to go into "Developer options" screen to turn on "USB debugging" mode.
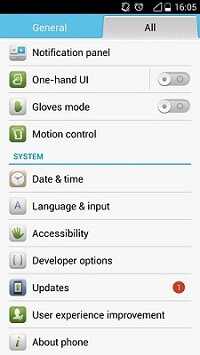
Part 3: Android 3.0 Honeycomb to 4.1 Jelly Bean
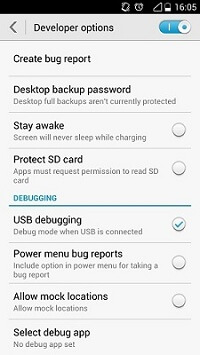
Go to "Settings" screen and tap "Developer options". Then, tap the box next to "USB debugging" so that you can connect your device to computer which can be done before enabling USB debugging, also.
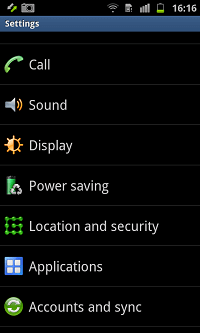
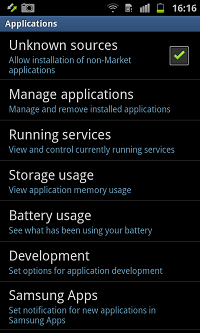
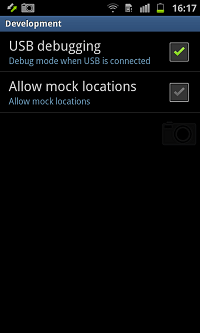
Part 4: Android 2.3 Gingerbread or Earlier
Tap "Settings" on the home screen to enter "Application" > "Development" and tick "USB debugging". That's it!
With the help of this guide, are you aware of how to enable USB debugging on your personal Android phone? The first thing you need to prepare for this job is to make sure which Android OS is in your devices. Now, you're allowed to download something on your phone freely and quickly root your phone, back up your Android phone files, etc.
