Typically, there must be a bridge to build connections between your cell phone and computer in order to finish many instructions such as data transfer, data recovery and so on. And, that bridge is generally known as a USB cable. It happens sometime that the cable is working perfectly but the connection still fails. So why on earth is it? Perhaps is something wrong with the USB debugging. You can scroll down for more information.
● How to Enable USB Debugging on Android Device
● How to Retrieve Android Data on Broken Phone
What is USB Debugging?
USB debugging is a bridge between Android phone and computer. To have our Android data managed (recovered or transferred), we will be asked to enable USB debugging so that the contacts, videos, messages, photos and more can be read by our computer.
What If USB Debugging Fails When Being Enabled?
There're still some ways to recover data from your Android even if USB debugging keeps failing or is unable to be turned on because of broken screen. What you need is an outstanding Android Data Recovery on your computer and prepare for an USB cable for your Android phone.
What Can Android Data Recovery Help?
Android Data Recovery is a professional data recovery program for Android phone even if your Android suffered from different situations: USB debugging fails when enabling, black-screen, dead, water-damaged, screen cracks, etc. Data like contacts, messages, photos, videos, music, and more, can easily be recovered with simple steps.
Method 1. How to Recover Data from Android with USB Debugging Off
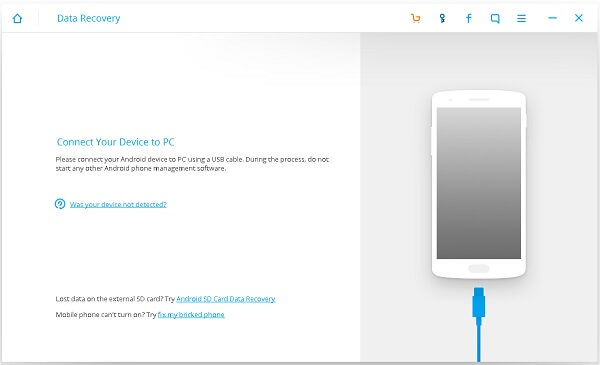
Step 1. Download and Install Android Data Recovery. First thing first, you will be asked to download Android Data Recovery on your computer. Launch it after the installation. Then, in the primary screen, as shown below, you can choose the third choice on the left side.
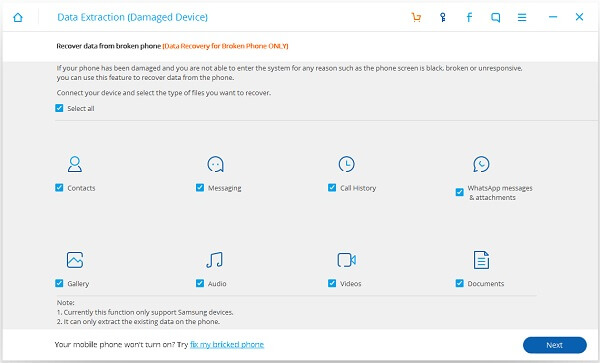
Step 2. Choose Data Type to Scan. In this step, all the recoverable data types will be listed, including contacts, messages, call history, gallery, audio, videos, WhatsApp messages & attachments.
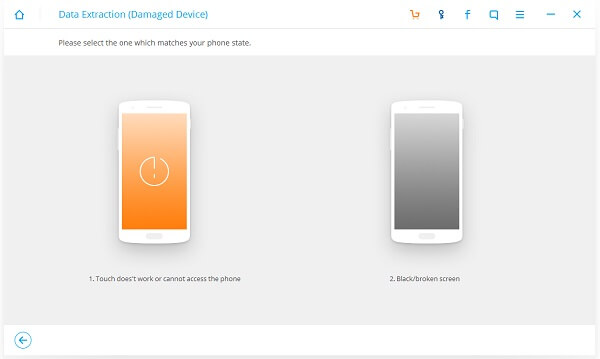
Step 3. Choose Fault Type of Your Android. In the interface, there are two options provided, "1.Touch cannot be used or cannot enter the system" and "2.Black screen (or the screen is broken)". Choose one of them accordingly and choose your phone model in the next screen. As for the debugging mode failed, it is advised that the left choice may be suitable.
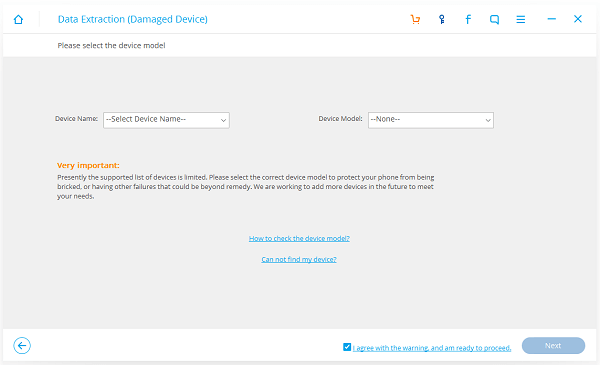
Note: This "Recover Data from Broken Android" function only works for some of Samsung devices in Galaxy S, Galaxy Note and Galaxy Tab series by now.
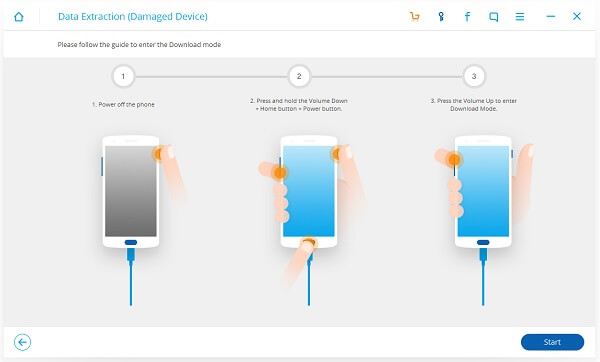
Step 4. Enter Download Mode. Hold your Android in hand and enter download mode as below:1. Power off Android.2. Press "Home", "Power" and "Volume-" at the same time.3. Press "Volume+".
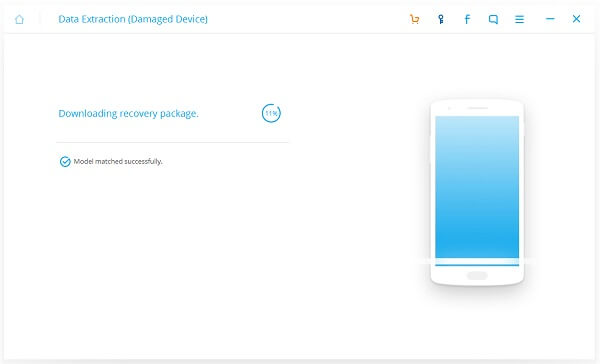
Now, connect your Android to the computer via USB cable and it will start downloading recovery package for you.
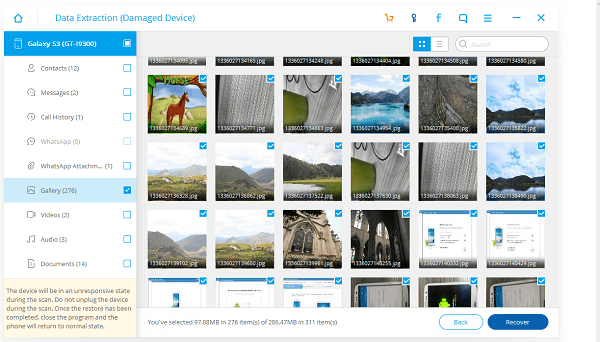
Step 5. Recover Data from Android with USB Debugging Off. Here we come to the final but most critical part – recover. After the 4 steps above, all the data you've chose will be shown in the interface on the left panel. Tap the data type you want to recover, photos for instance. Tap on "Gallery" and the photos will be listed in thumbnails. Tick the box next to the photos you want and click "Recover" to restore photos from your Android with USB debugging off.
With only 5 simple steps, you can retrieve data on your broken Android even if there's something wrong with the USB debugging and you can't enable it. It is very efficient and handy for Android users.
Method 2. How to Fix USB Debugging Connection Problem
It is very frustrating when Android phone fails to connect to computer over ADB mode(Android Debug Bridge). Before giving up, you may try these steps to fix the USB debugging connection problem.
Step 1. Restart your phone. Sometimes after being restarted, the phone can be connected to the computer normally.
Step 2.Check if USB debugging is enabled on your Android phone. If not, enable USB debugging.
Step 3. Make sure that your phone is recognized as an ADB device on the computer:
Right-click "My Computer" and choose "Manage".
In the pop-up window, choose "Device Manager".
Find your device's ADB interface in the list. Check if there is an entry with "ADB" in its name.
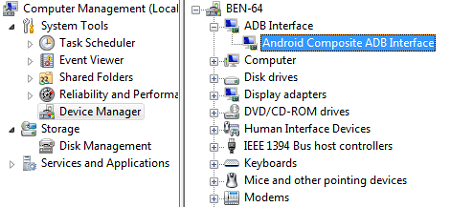
Normally, you'll see the ADB entry under "ADB Interface", or "Android Phone" , and sometimes under the manufacturer name instead (e.g. "Samsung", "HTC"). If you can't not find ADB entry, you may try to fix the problem by:
Reconnecting your Android phone;- Change the connection modes of your phone, for example, switch the MTP mode to Camera Mode.
Step 4. Delete original ADB driver and install a universal ADB driver. Sometimes a universal ADB driver could fix the USB debugging problem:
Connect your Android device via USB and remove the ADB drivers. Then disconnect your device.
Download an universal ADB driver and install it on your computer. There are various universal ADB driver available online, choose the one that matches your device.
Hope the USB debugging connection works for your Android phone after the above steps. Now you can recover your data with Android Data Recovery in normal state from Samsung, HTC, LG, Sony, and more.
