"Due to my work, I have plenty of images stored on my MacBook Pro. Last weekend, I got spare time to delete unwanted photos. However, I want to send an image to my colleague but cannot find the image. I think it might be accidentally deleted. Can I retrieve the deleted image on my Mac. It's been 2 days so far. HELP!"
People Also Read:
● How to Recover Android Data on Mac?
● How to Restore Photos from Hard Disk Drive on Computer?
Mac doesn't provide users with the 30-day in-case-you-regret time after photos are deleted as iPhone does. That's totally unfair, isn't it? If you ran into the problem like the above case, it would have been a great trouble for sure. If you're looking for a workable method to recover deleted photos from your Mac, now let's cut to the chase.
Method: How to Restore Lost Photos from Your Mac?
Data Recovery is a Mac File Recovery expert for your consideration when you want to recover some data from Mac without backups, including photos, videos, audio, emails, documents. How is that possible? This program can perform a thorough scan down into hard disk drive or solid state drive on Mac to reach those deleted and invisible files. As an intuitive software, you can take no effort to use it. Don't Miss: To have further knowledge of Data Recovery, here is a full guide - [Hard Disk Recovery]The Best Data Recovery for Win/Mac.
Step 1. Get Started with Data Recovery
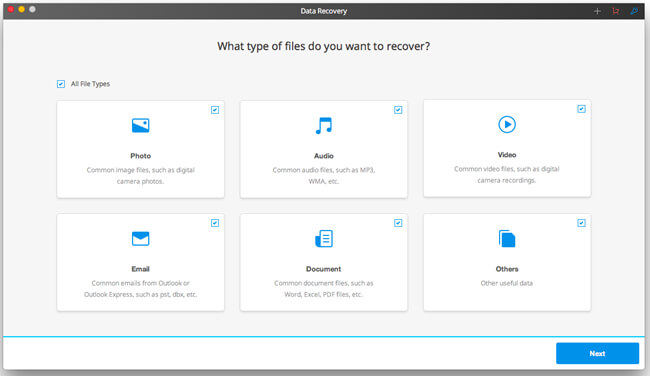
Please give it a click on the download button above to enjoy the free trial of Data Recovery. When you launch the program, it will prompt you to select types of data to scan, please highlight the "Photo" option and click "Next" to go on.
Step 2. Choose A Location to Scan
Now, you should select a path to start scanning. However, Mac doesn't allow users to locate to a specific folder except Desktop, Trash and Document. So, it may take some time to finish scanning. Also, if no desired data are found, you can switch from "Quick Scan" to "Deep Scan".

Step 3. Restore Photos to Computer
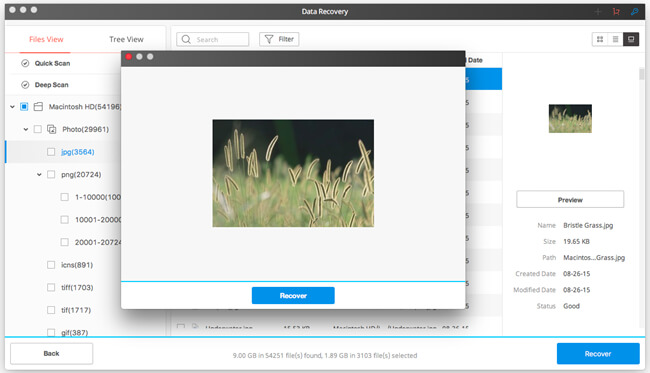
Data Recovery will display all results on the interface, please look up your deleted photos. Then, select some of them you want to retrieve and click "Recover" button to get them back.
Note: How to Back up Photos on Mac via Time Machine?
There is no doubt that data loss will cause a headache for users. Whether you have or haven't encountered such a trouble, it's strongly recommended to back up your Mac with Time Machine, a default feature of your Mac.
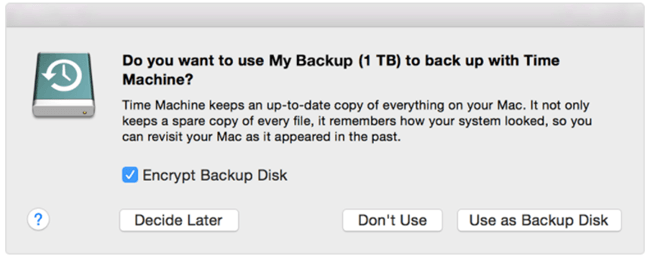
To use Time Machine, you must have an external hard disk or purchase external storage solutions. When you connect the external hard drive directly to the Mac for the first time, a pop-up will ask you whether you want to use this hard disk to back up with Time Machine as the following image shows. (Also, you can encrypt the backup disk.) Now, please click "Use as Backup Disk".
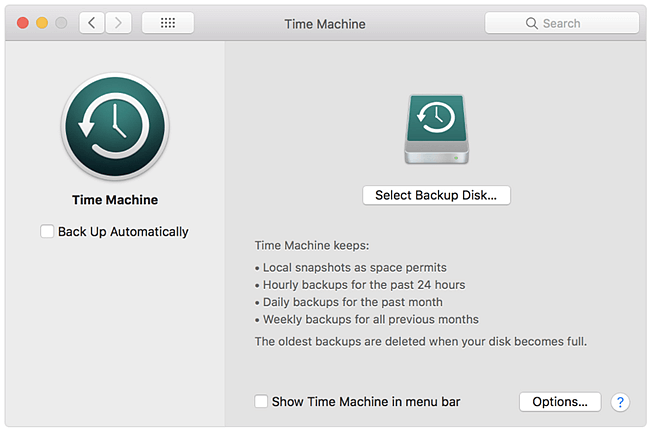
Note that it automatically makes hourly backups for the past 24 hours, daily backups for the past month, and weekly backups for all previous months. The oldest backups are deleted when your backup disk is full. The first backup may take a long time. However, if you want to manually back up your Mac, please follow the steps.
Step 1. Go to "Apple Menu" and choose "System Preferences".
Step 2. Click "Time Machine" and select a disk as the Backup Disk.
Step 3. Choose "Back Up Now" from the Time Machine menu.
So, in order to avoid data loss, you should really attach importance to Time Machine. Once backed up, you will never be afraid of any accidental system corruption or system bugs.
