"Unfortunately System UI Has Stopped" is an error message that some Android users might bump into when the operating system update was either corrupted or unsuccessfully patched on your cell phone.
People Also Read:
● How to Fix Android Apps Stop Working?
● How to Fix When Google Play Store is Crashing?
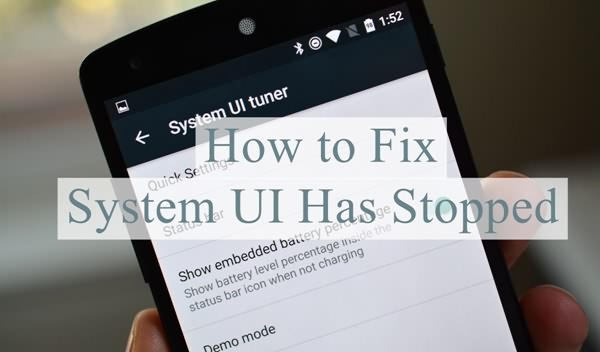
Before we proceed, in case you don't know what System UI (Tuner) is, let's make out what it is in the first place. In 2015, Google introduced a neat hidden menu on Android Marshmallow phone or tablet which gives users a a bit of control over status bar and its pull-down menus - the System UI Tuner.
Now that you've got your way around System UI Tuner, it's time to learn what cause the nuisance and how to settle this problem. Please kick in and read on.
Reasons: Why System UI Has Stopped?
As a rule, system UI would be stopped due to reasons like:
- System operating update is corrupted or unsuccessfully installed.
- Application is not compatible with the UI interface.
- Try to install a new ROM recently.
- Try to root your device on your own.
- Manage a bunch of data on the device recently.
- Restore data from a previous backup.
Method 1: Remove Incompatible Applications
If the app(s) you just downloaded onto your device is/are incompatible with the current Android version, the system UI might be acting up. Especially on rooted devices, with tweaks and programs available on sources, their compatibility is not always guaranteed.
If system UI tuner was stopped after you install an application/tweak, please delete the program/tweak and restart your device to see whether it's working well now. Also, don't download any app from unknown sources.

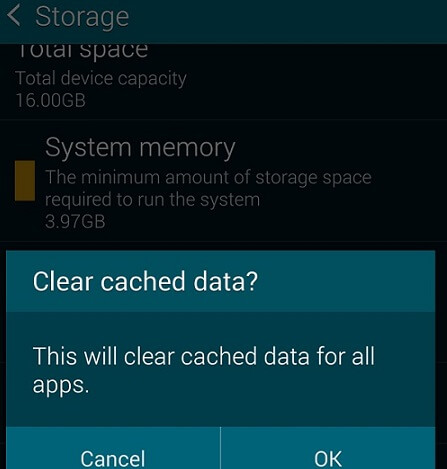
Method 2: Clear Cache and Data on Device
There is a tricky method for you to try. That being said, you should delete cache and data on your device, especially if your device's running out of memory. In addition, redundant cache and data has negative impact on the performance of the device. Moreover, it's a good habit to clear cache and data from time to time.
Step 1. Launch "Settings" app on your Android phone.
Step 2. Locate and select "Storage" option.
Step 3. Tap on "Cached data" and choose "DELETE" when ask whether to clear cached data for all apps.
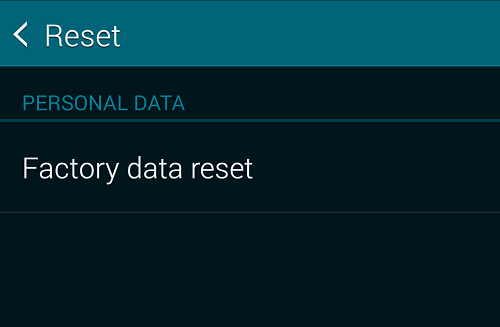
Method 3: Reset Android to Factory Settings
If you're going to take this shot, you want to have a complete Android backup at first in that resetting a device means to restore it to a brand new device without having any personal data on it. If having a backup, you now can follow the steps as below. There are two ways available.
Method 1: Go to "Settings" > "Reset" > "Factory data reset" > "RESET DEVICE".
Method 2: Power off your device > Press down "Home", "Power" and "Volume Up" buttons together for a while > use volume keys to navigate to "wipe data/factory reset" > Confirm via the "Power" button.
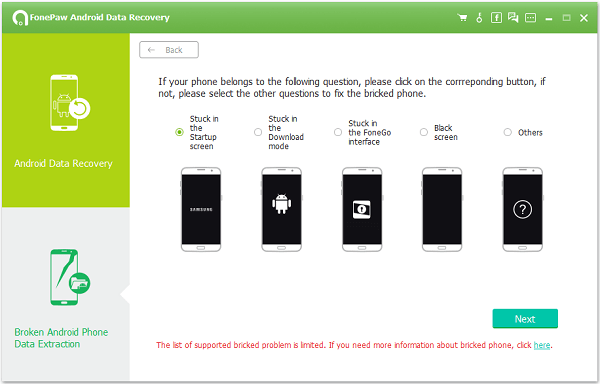
Method 4: Try Fixing Issue without Data Loss
As an expert in terms of system glitches, Android Data Extraction is able to fix troubles caused by system breakdown. This software is able to replace the troublesome firmware without data loss. As a user-friendly program, to use it is as simple as ABC.
Supported Devices:
- Samsung Galaxy S4/S5/S6;
- Samsung Note 3/Note 4/Note 5;
- Samsung Galaxy Tab Pro 10.1;
Step 1. Download and install the software on your computer.
Step 2. Launch Android Data Extraction and click on "Fix Device" to go on.
Step 3. Select fault type - "Others". Then, choose "Device name" and "Device Model".
Step 4. Follow the on-screen instructions to enter Download Mode.
Step 5. Start downloading recovery package and wait till recovery is done.
Hope this article helps. You'd be free from this headache in no time beyond doubt. If you have any idea, you're welcome to share with us!
