Taking a screenshot of your Android device can sometimes be confusing as operations vary from phone to phone. Here we separately introduce some shortcuts to take screenshot on Android 2.3 and lower, and Android 4.0 and above.
Method 1. Take Screenshot on Android 4.0 and Newer
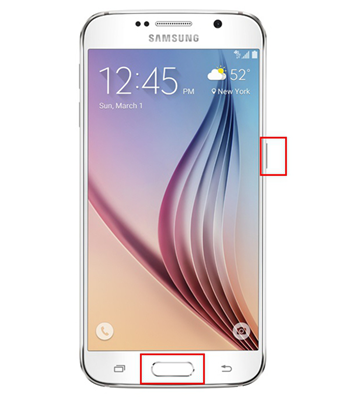
If your Android phone runs on Ice Cream Sandwich (4.0) or above, it is available to capture screenshot with the built-in screenshot feature. Just press the Volume Down button + Power buttons at the same time. Hold for a second or more till you hear the camera shutter button or see the message "Saving screenshot".
Method 2. Capture Screenshot on Android 2.3 and Earlier
If you are using a device works on Android 2.3 or earlier except some certain devices like Samsung phones, unfortunately you may fail capture screenshot by pressing the combination of physical buttons. But it varies from phone to phone.
If your phone comes with no shortcut built-in, you will need to download a program like Android Manager and take screenshot with the help of the tool.
Step 1. Run Android Manager.
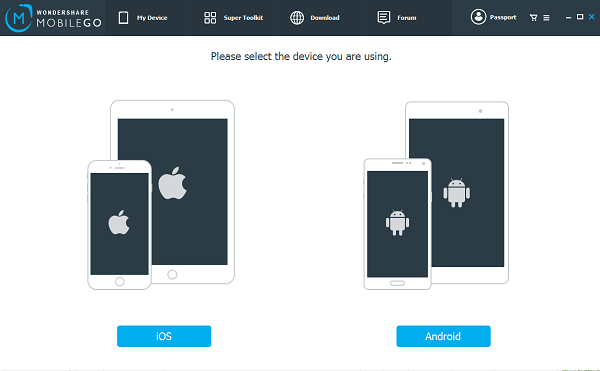
Download and install Android Manager for Windows or Android Manager for Mac on your computer. Then open the program and select "Android". After that, connect your Android phone to the computer via USB debugging or Wi-Fi.
Step 2. Take Screenshot with Android Manager.
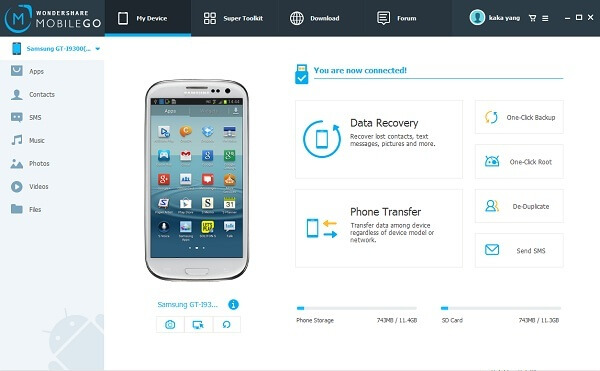
When your Android is connected, you can see the phone screen on the interface. Make sure that the screen is exactly the one you would like to capture. Then click the camera icon under the device. Then select a path to save the screenshot.
When screenshot is successfully taken, you can find the shot in gallery. There are more screenshot methods than we could possibly list here, but these are some of the easiest. If you have more ideas, just share with us.
