Would you want to own the right to read and write programs on Android phones so that you're allowed to edit, change, and even delete those programs on your devices? Of course, we'd like to because some awesome apps on our phones make the devices suffer many troubles, like battery draining fast, the original settings and apps changed with difficulty. Such awkward situation only brings anxiety to us, so why not seek for getting rid of these anxiety about our Android phones?
OneClick Root is designed to root Android swiftly to endow us with permissions to read, write and execute some tasks on devices which are not reached before rooting. This app supports many kinds of Android phones and tablets, like Sony, LG, Samsung, HTC, One Plus.
Tutorial 1: Root Android Phone with OneClick Root
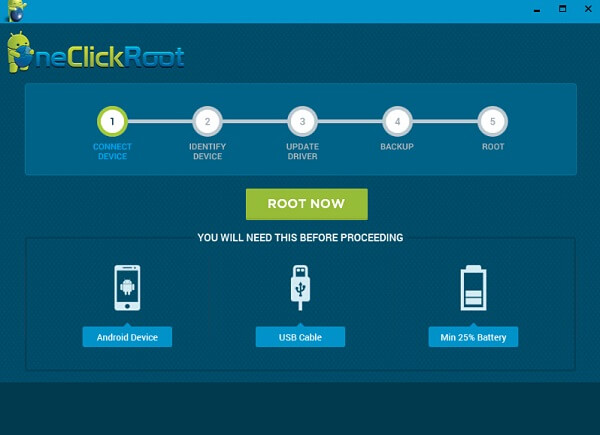
Step 1. Launch OneClick Root on PCDownload and install OneClick Root and click "ROOT NOW" on the screen. Simultaneously, set up USB debugging on your Android devices.
Notes: Find out which Android OS is in your phones and execute and steps below:
- For Android 5.0 or later/Android 4.2 to 4.4.4: Enter "Settings" > "About Phone" > Tap "Build number" for several times until "You are now a developer"/"You are under developer mode" appears > "Settings" > "Developer options" > Check "USB debugging".
- For Android 3.0 to 4.1: Enter "Settings" > "Developer options" > Tick "USB debugging".
- For Android 2.3 or earlier: Go to "Settings" > "Applications" > "Development" > Tick "USB debugging".
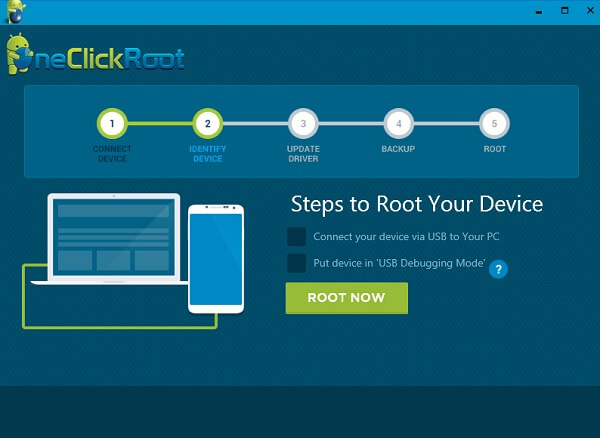
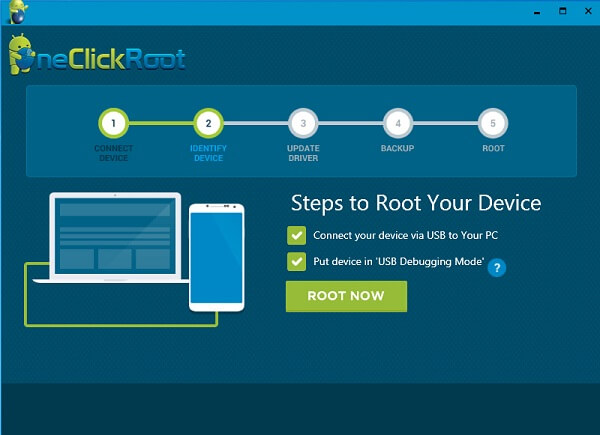
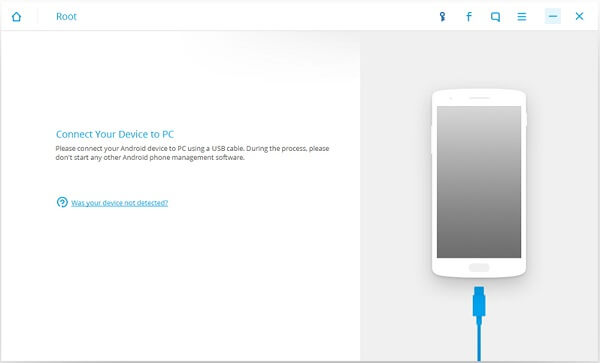
Step 2. Connect Devices to Computer. Use a data cable to connect your Samsung, HTC, or others to computer and wait for several minutes for the next screen coming.
Notes: Actually, this program might not be proper for a handful of Android devices, so rooting may fail.
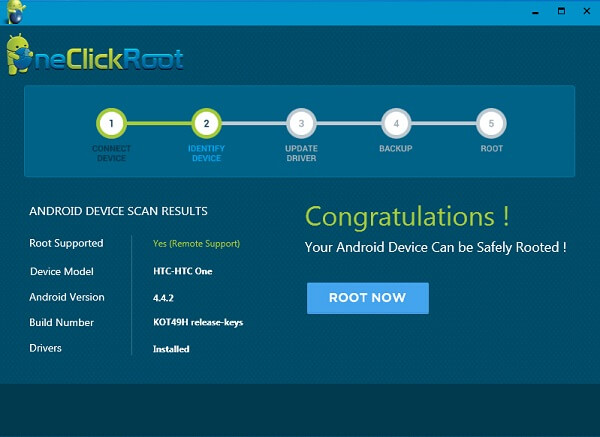
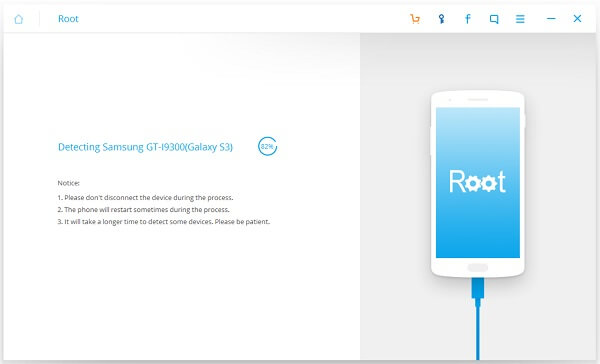
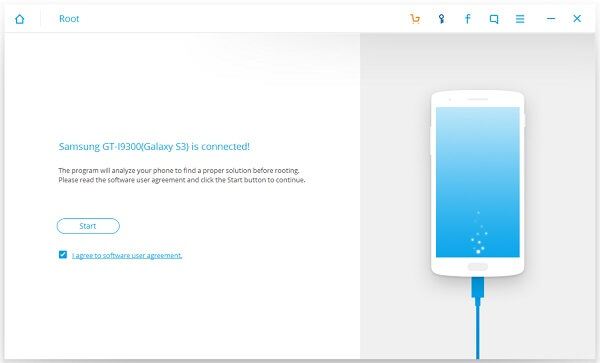
Step 3. Start to Scan Phone. When the following screen appears to you, click "ROOT NOW" to get your phone into the process of detecting.
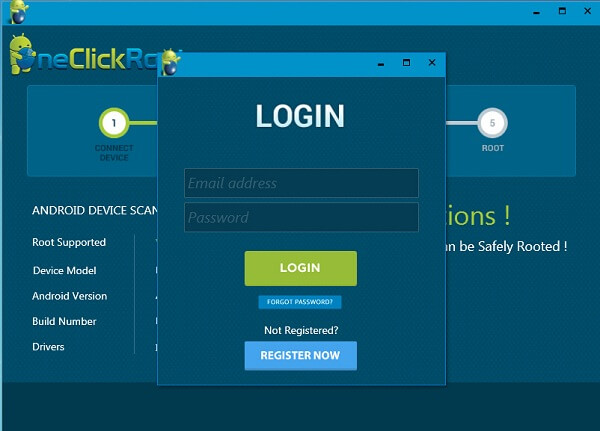
Step 4. Update Driver. "Congratulations!" is presented on the interface so that your device can be rooted with this app. If you press "ROOT NOW" on this screen to go on, you will be asked to log in or register with account and password with purchasing.
Step 5. Log in OneClick Root. If you have account, sign in directly, but if not, move to register at first. Click "REGISTER NOW" to purchase account and then you're allowed to go to the next step.
Step 6. Back up Phone. Even though this app scarcely goes wrong in removing your phone data, it might be better to back up Android files before rooting.
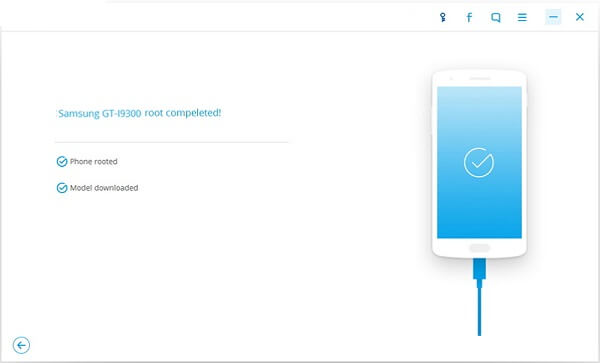
Step 7. Get Phone RootedFinally, follow the direction to make your Samsung, LG, HTC, Nexus, etc. get into rooting process. Wait for several moments to gain a rooted phone.
Notes: During the procedure, your devices need to be rebooted so enough battery on the device is a must.
Tutorial 2: Root Android Phone with Android Data Recovery
Android Data Recovery is a very effective program that can root your device with several "click". First of all, please download the program and run it on your computer.
Step 1. Plug Your Android Device into PC. In the interface of the program, go to "More Tools > Android Root" and then plug your device into your computer via the USB cable that is matched. Then go to your device and enable the USB debugging.
Note: You can follow the guides below to enable the USB debugging on your device:
- For Android 5.0 or later/Android 4.2 to 4.4.4: Enter "Settings" > "About Phone" > Tap "Build number" for several times until "You are now a developer"/"You are under developer mode" appears > "Settings" > "Developer options" > Check "USB debugging".
- For Android 3.0 to 4.1: Enter "Settings" > "Developer options" > Tick "USB debugging".
- For Android 2.3 or earlier: Go to "Settings" > "Applications" > "Development" > Tick "USB debugging".
Step 2. Detect Android Phone. After your device is connected successfully, the program would start to detect the status of it and would check whether your phone is being rooted or not.
Note:1. Please keep your device and PC connected during the process, or it would fail to operate.2. It may take some time to finish the connecting, please wait patiently.
If your device hasn't been rooted, you can see the interface as below after the detecting completes.
Step 3. Root the Android Phone. Now the program would detect your device and check if the model is supported or not. If it is supported, you can begin to root your phone by clicking the "Root Now" button. In the rooting process, you need to go to your device to confirm the messages of rooting your device in a pop-up window. After that, you can root your Android phone in a moment.
Note: Actually, most of the Android models are being supported. If you have no idea whether your device can fit the program or not, it is ok because you can also download the trial version to have a try!
Many app programmers have developed many types of rooting software for Android users to choose. Compared with OneClick Root, Android Data Recovery can root your device in a more simple way. As most of other apps are free, including Kingo Root, iRoot, Root Genius, it is free to select the best one for yourselves and your Android devices.
