There is no doubt that Android phone users refuse to root their beloved Samsung Galaxy S6 edge partly since there are some problems coming along with rooting Android devices. The two major reasons are about the warranty and updating of your Android phones. After rooting, you will lose the way to access warranty and the system update will not remind you automatically. On the other hand, it may be not a bad news for everyone. Not all people are keen on updating Android frequently so they want to keep the basic status and rooting can give them right to manage their phones.
Some rooting apps are recommended in Google, but as for me, Root Genius is practical as it provides one-click way to get my Android device rooted successfully and it will list some functions on the screen after you have rooted. Let's come to have a try with this wise Root Genius.
Part 1. Root Android Device with Kingo Root
Step 1. Download and Install Root Genius. Download Root Genius on your PC and install it. Then, move to connect your Android device to computer using USB cable. Once you plug the phone into computer, you cannot disconnect it during the rooting process.
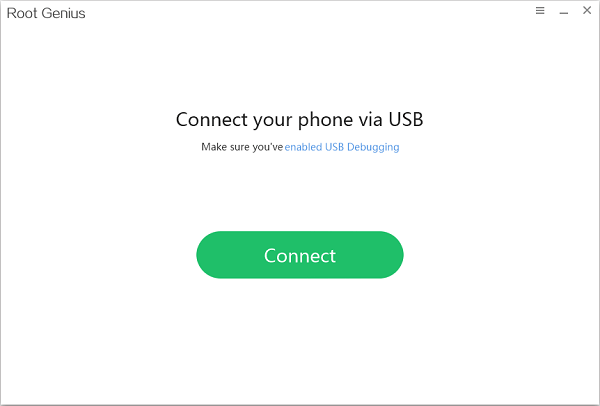
Step 2. Enable USB Debugging. Every time you connect phones to PC and launch an app, you need to set up USB debugging before or after connecting.
- If the device with Android 5.0 or later: Tap "Settings" > "About Phone" to tap "Build number" seven times for "You are now a developer!". Then, move to "Settings" > "Developer options" to turn on "USB debugging".
- For Android 4.2 to 4.4.4: Just try "Settings" > "About Phone", tap "Build number" for several times until you get a note: "You are under developer mode". Then, go back to "Settings" > "Developer options" > "USB debugging".
- If it is Android 3.0 to 4.1: Find "Settings" > "Developer Options" > "USB debugging"
- If you use Android 2.3 or earlier: Click "Settings" > "Applications" > "Develpment" > "USB debugging".
Step 3. Root your Devices/Tablets. In the following interface, move your mouse to click "Root now" to start the process and the next screen will tell you how much the rooting is done until the end.
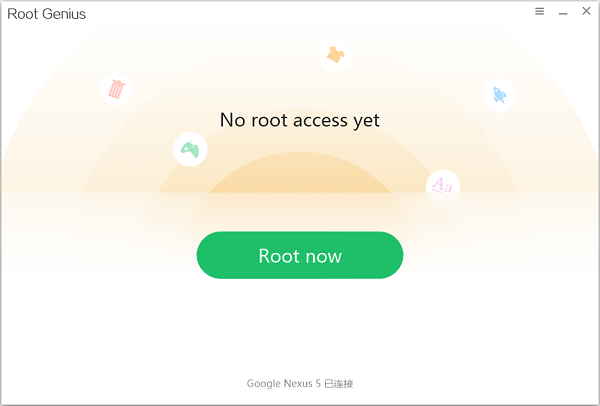
Notes: Even though rooting has high success rate, you'd better do Android backup with Mobile Transfer.
Step 4. Complete RootingWhen you finish rooting, the signal will appear on the screen. Moreover, another program named Kinguser will install on your phone automatically.

Notes: You can view four functions on the screen so that you can uninstall some apps and remove password, etc. on your devices. However, some phone versions may fail in rooting because this app may not be designed to fit all Android phones and tablets.
Part 2. Alternative of Root Genius
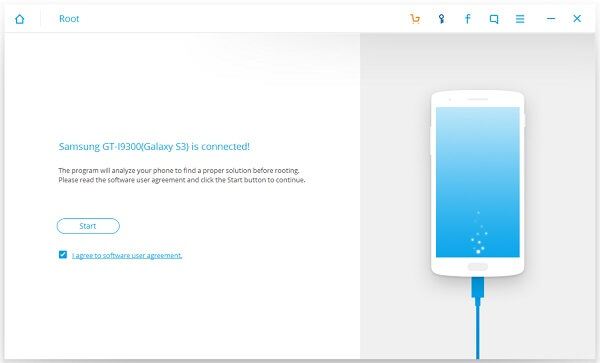
As you can see above, Root Genius is a great rooting kit for most of the Android users. Similarly, there is another program that could do almost the same as Root Genius. This useful program would be Android Data Recovery. With it, you don’t have to worry about the problem if the Root Genius could not work one day and you can root your Android phone with the alternative in several simple steps.
To sum up, these smart rooting apps bring convenient to allow you gain privilege of customizing your phones, flash custom ROMs, stop advertisement, etc. which can not be handled if your Samsung, HTC, Sony, HUAWEI, Xiaomi has not been rooted. After reading this, leave your ideas below to let me know what you think of this app.
