Today, we are going to share tips and tricks on how to recover lost data from iPad. Before starting, let's look through the case. "Yesterday my young son played games on my iPad mini 4. He might press some buttons and deleted all the data in the device, containing messages, photos, music, videos, and so forth. I have searched the device but they were nowhere. Now how can I deal with it?" Have you ever encountered such thing as Jerry? I guess your answer is "yes". As to me, every time I restore deleted files from iDevice, I turn to iPhone Data Recovery.
Some iOS users are not strange with iPhone Data Recovery since this program is increasingly popular now. It helps restoring all kinds of lost files embracing text messages, contacts, pictures, ans so forth. For further details about the instruction, just browse the guide.
What you need:iPad Mini 4PC or MacUSB cableiPhone Data Recovery
Notes:
1) Please install iTunes on your computer before you download iPhone Data Recovery.
2) Stop using your iPad once you find it lost contents and ensure that data is not overwritten.
Part 1. Directly Restore Contents from iPad
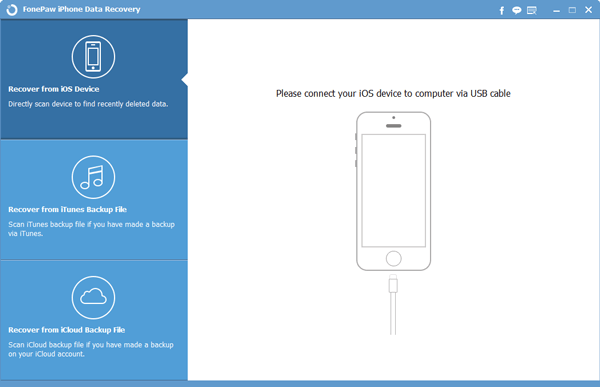
Step 1. Attach iPad to Computer
Launch iPhone Data Recovery. Then the program will enter the defaulted mode--Directly Recover from iOS Device. Connect your iPad to PC or Mac with USB cable came with it.
Step 2. Scan Data in iPad
When your iPad Mini 4/iPad Pro is successfully plugged to computer, click Start Scan to detect and analyze data in iPad. It can take some time. Please wait for the result patiently.
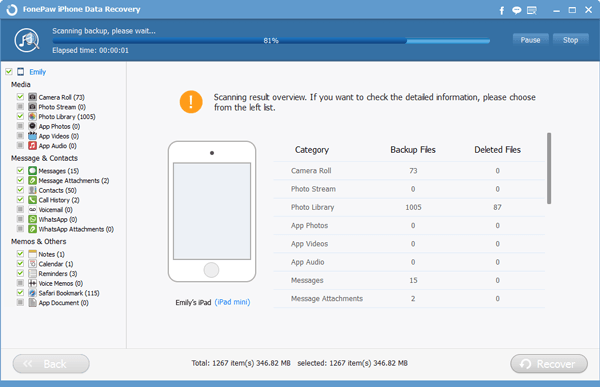
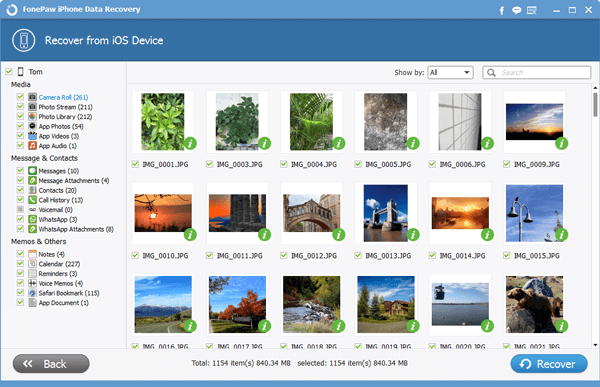
Step 3. Preview and Restore Files from iPad
After the scan, your data will be orderly sorted into different categories at the left column. Choose whichever one and then items of it will be displayed in detail. Choose and click Recover to get them back.
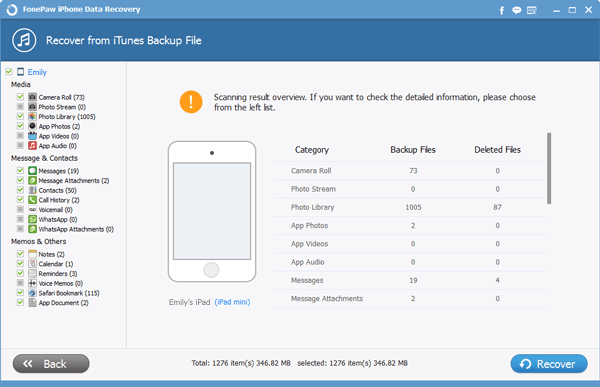
Part 2. Retrieve File via iTune Backup
Step 1. Scan and Analyze Contents in iTunes
Choose Recover from iTunes Backup. Then click Start Scan to get iTunes backup files detected and analyzed. After that, scanning result overview will come up. Choose your wanted data from the left column for preview.
Step 2. Recover Data from iTunes Backup
After previewing contents, select and click Recover to retrieve them. All these items will be saved on your computer.
Part 3. Regain Data from iCloud
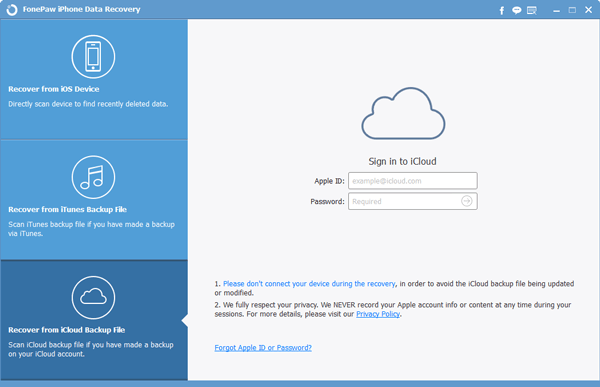
Step 1. Log in iCloud
First of all, press the third mode--Recover from iCloud Files. Then the window occurs and prompts you to log in iCloud. Input your Apple ID and the password. The program will enter iCloud. Don't worry about any info leak. Our program is 100% clean.
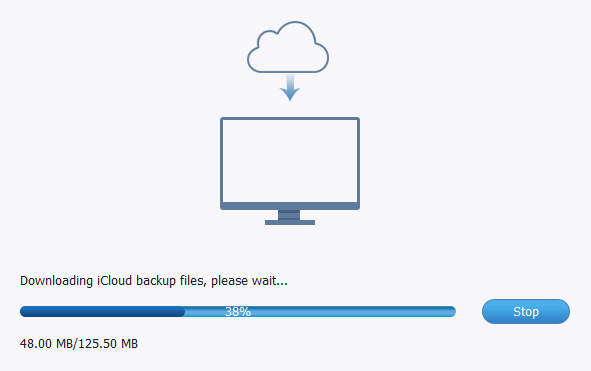
Step 2. Download Photos from iCloud Backup Files
After entering iCloud, it is high time you need to download your previously backed up files from iCloud. Click Download and then wait with patience.
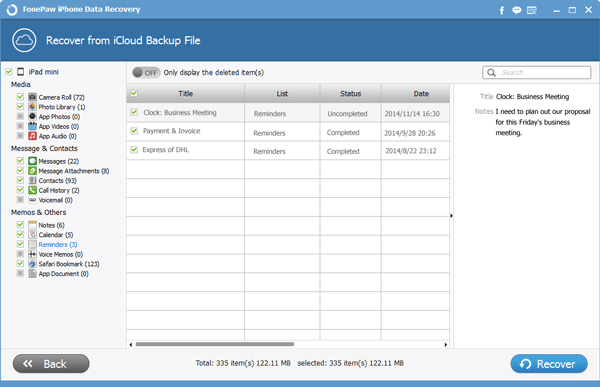
Step 3. Preview and Retrieve Files from iCloud
With the last step done, scanning result overview is listed on the left column. Click your target item and preview all the detailed files contained. Then tick and choose the ones you are intended to retrieve. Click Recover to save them on your computer.
Note: For your information security, a backup of it is a necessity. Copy them to your iCloud or iTunes.
Is it efficient? Just share it with your friends. And your messages about your new iPhone 6s/6s Plus/iPad Pro are welcomed. Just leave them below.
Related Articles
- How to Recover Lost Data from iPhone/iPad/iPod
- How to Recover Data from Water Damaged iPhone
- <a target="_blank" href="https://www.android-recovery.net/recover-iphone-files.html" "="">How to Recover Deleted Files from iPhone
- How to Recover Lost Data from Android
