Nexus 5 is an amazing Android phone that have a full functionalities. That is why many Android users are fascinated with it. A rooted Nexus 5 can improve user experience further by unlocking more features. However, for a newbie, the Root process should be complex without a guide. That's why we are here. This post will show you how to get ready for rooting and how to root your Nexus 5 on Marshmallow manually.
Part 1. Get Ready for Rooting
1. Back up important Android files in your Nexus, such as contact, messages, pictures and more. This is because your file faces risks when the phone is being rooted. If you have no copy of your Android files, you may lose them permanently.
2. Make sure that battery is no less than 80% charged. This is to ensure that your Nexus will not shut down during rooting.
3. Never stop the rooting process by unplugging your device or shutting it down. Otherwise your phone can get bricked.
4. Check USB debugging. This is only required when you root your Nexus 5 with computer. To successfully connect your Nexus to the computer, you need to turn on USB debugging. You can do this by following the path: Go to Settings > About Phone > Built Number. Tap "Build Number" for seven times to unlock Developer Options. Then go to "Developer Options" and check USB Debugging.
5. Close default firmware before the Nexus 5 is rooted. This is to prevent it from tampering the Root process.
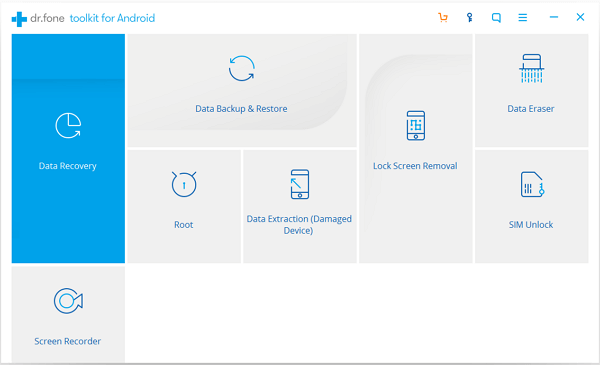
6.Find a safe and effective program for rooting. This should be the most important preparation steps before rooting. If you have reliable program in your computer, use it! If not, you can try Android Data Recovery. This is a professional expert excelling in dealing with Android issues like rooting. Click the Download button below to get this software.
Part 2. Root Nexus 5 with Root Program
1. Donwload ElementalX Kernel and SuperSU 2.52 on Nexus 5.
2. Reboot the Nexus 5 to the Bootloader after downloading both the files.
3. Use the volume buttons at the side and the power button to go to "recovery" and enter "TWRP" respectively.
4. Tap Install and go the preciously installed kernel.
5. Flash the kernel after tapping on the kernel file.
6. Once the flash is done, press on the Home button.
7. Now touch Install and go to the file of SuperSU.
8. Then press the file and flash it.
9. Now click on the "Reboot System" button (seen in the picture above).
10. After rebooting, you can use Root Checker to check whether you could root or not. A green message from the app will confirm the root.
Part 3. Root Nexus 5 on Marshmallow
Step 1. Open Android Data Recovery and Download Root Tool
Open Android Data Recovery your Windows/Mac. Choose "Root" mode and click the arrow button to download this tool. Make sure that the network is available.
Step 2. Check Root Status Connected Nexus 5
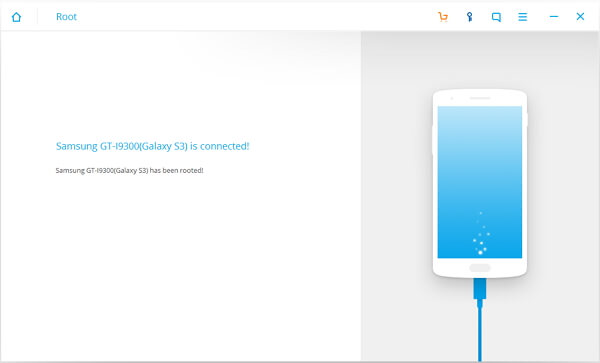
When the Root tool is 100% downloaded, plug your Nexus 5 to the computer with USB cable. When your phone is connected, you will have the message like "Nexus 5 is connected". Then the program will check Root status of your device.
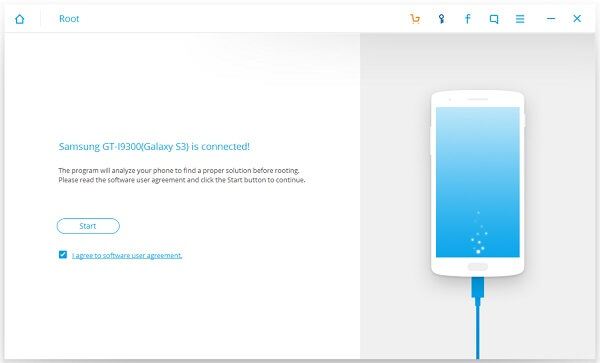
Step 3. Analyze Nexus to Find Root Solution
Android Data Recovery will analyze your Nexus 5. Then it will find a proper solution before rooting. Click Start button to continue.
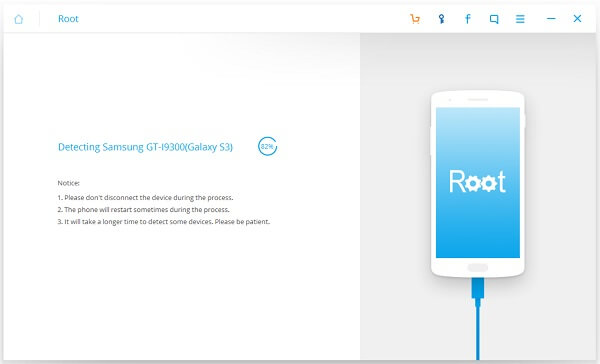
Step 4. Detect Motorola Phone
In this step, the program will detect the Nexus 5. You should not unplug the device during the process. The device may reboot. Don't be panic. To complete the Root process, it can take some time. Be patient.
Step 5. Root Nexus 5
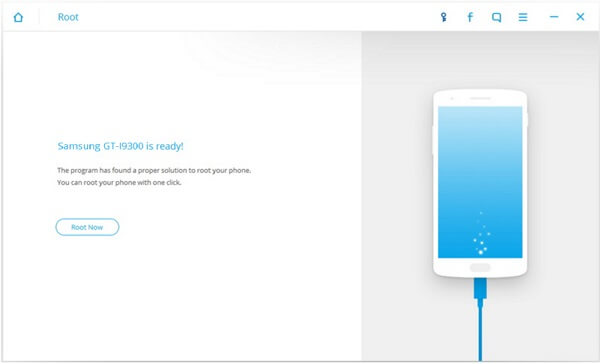
Generally, your Nexus 5 is supported. That is to say, you will have the window below. Click the "Root Now" button to root your device.
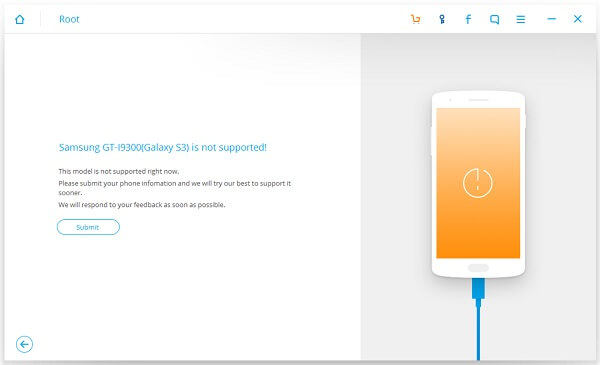
If your Nexus 5 is not supported by the Root tool, you will have the prompt message. Please click the "Submit" button to submit your phone information. We will response to your feedback as soon as possible. Then unplug your device.
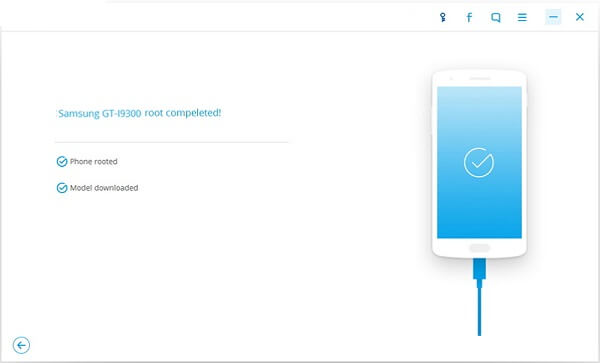
Now your Motorola phone is rooted. You can see the window as below. You can download apps from Google Play and enjoy the time with tons of funny apps!