Most Android phones come with recorders that allow users to record voice. But sometimes recorded voices can be deleted or lost because of this or that, for example:
- Restoring Android device to the factory settings erases all files saved in an internal memory of the device.
- Wrongly tap the Factory Reset button to erases all files saved in an internal memory/SD card of the device.
- When Android device is hacked by viruses or malwares.
- Sudden power failure or corruption when moving voice recordings to another location.
- Voice recordings may get erased by the action of third party apps.
In this guide, we will introduce an common Android recorder, recording steps and how to retrieve recordings from Android cellphone.
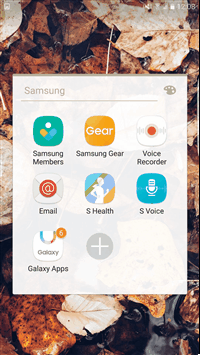
Part 1. Common Android Recorder
Many Android cellphones come with simple voice recorder. Below are features of a specific Android recorders:
Sound quality:High – 48KHz You can record for 12 hours.Medium – 24KHzYou can record for 24 hours.Low – 8KHzYou can record for 72 hours.Please note that higher quality recordings take up more storage space.
Record:- Records by background.- 16 bits/Mono- Records no time limit
Playback:- Playback by background- Rename- Send mail
Permission:- Record audio- Wake lock (to background recording)- Write to external storage (to store recordings)- Trim recordings.
Part 2. Recording Steps
- Tap and activate the recorder on your Android phone.
- Tap the red icon to start recording.
- To pause recording, tap the red icon again.
- To stop recording, tap the square icon.- After touching the finish icon, there should be a popup Save message. You can click OK to confirm saving.
Part 3. Retrieve Recordings from Android Cellphone
If recordings are deleted or lost, you can retrieve recordings from Android cellphone with Android Data Recovery.
Step 1. Download and Run Android Data Recovery
Click the Download button to download and install Android Data Recovery on your computer. Then run the program.
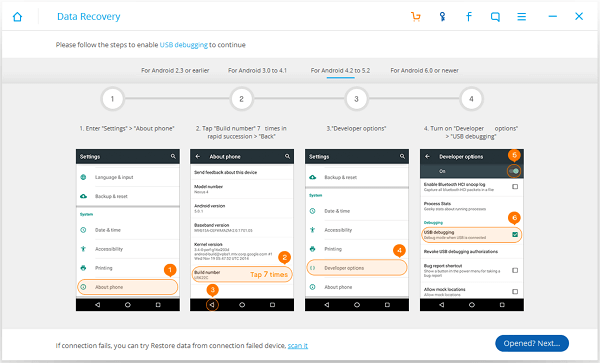
Step 2. Connect Android to PC
Connect Android phone to the computer. Then enable USB debugging on your device. Make sure that your devices have over 20% power left.
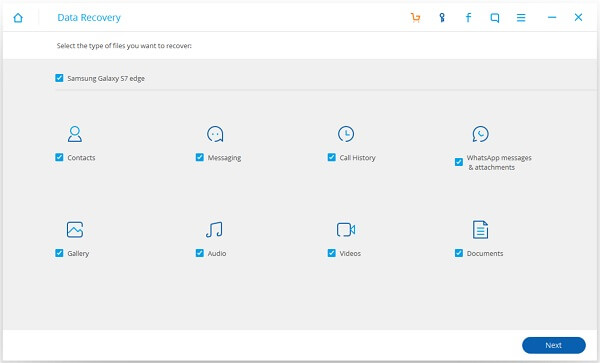
Step 3. Select File Types to Scan
After device is detected, the window below will be shown. Next to the boxes are the types of files to be scanned. To restore deleted recordings, please choose "Audio" and click the "Next" button.
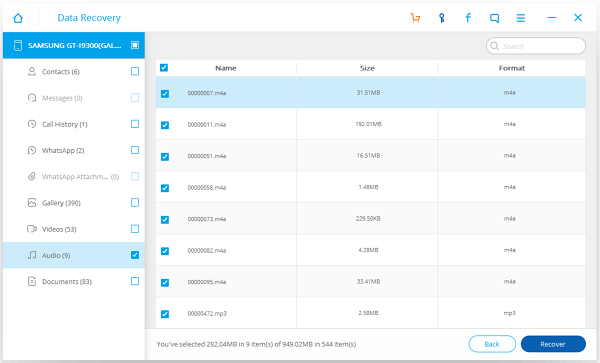
Step 4. Select Recordings to Retrieve
Android Data Recovery will scan deleted recordings. You can choose the right ones according to file name and click the "Recover" button to get your files back.
Warm tipsEasy, right? If your Android files are stored in the SD card before being deleting, you can recover files from Android SD card.
