"I was planning to give away my MacBook mini to my little sisters but, due to reasons, I didn't. I have used Time Machine to back up my Mac before I erased all content and reinstall macOS on it. However, some files seem to be missing after I restore the previous backup. Is there any way for me to get them back? Please HELP!"
People Also Read:
● [Guide] How to Recover Deleted Files from Mac?
● [Hard Drive Repair] Data Recovery from Broken Hard Disk Drive
That's right to erase files from your Mac's hard disk and reinstall macOS before you sell or give away your Mac. However, the vital precondition is that you have backed up your important files on the Mac. If you're in trouble with data loss after reinstalling macOS or erasing the hard disk drive/solid state drive on your Mac, this workaround is here for your consideration.
Feasibility: Discuss Possibility to Recover Files from a Formatted Mac
Mac uses hard disk drive(s) or solid state drive(s) to save users' files on the computer. After you delete or erase content from your Mac, the deleted files are truly invisible as if gone for good. However, they still exist in the disk but become inaccessible by normal software.
As long as not overwritten by new files, deleted data will still stay in your disk. If you still want to get them back, you'd better stop using your Mac right now. Also, as it's mentioned above, a professional Mac File Recovery program is needed. To save your time and effort to pick up a good program, you may try the free trial of Data Recovery for Mac.
Solution: How to Retrieve Data from Mac After Erased or Reinstall macOS?
Data Recovery for Mac is an easy-to-use and well-designed file recovery tool for all models of Mac including iMac, MacBook, Mac Pro, Mac mini, etc. This foolproof software can perform an overall scan on your disk to dig out and reach inaccessible files. To know your way around Data Recovery, please read on.
Recoverable Data with A Variety of Extensions:
- Photos(18): JPG, TIFF/TIF, PNG, BMP, GIF, PSD, CRW, CR2, NEF, ORF, RAF, SR2, MRW, DCR , WMF, DNG, ERF, RAW, etc.
- Audio(8): AIF/AIFF, M4A, MP3, WAV, WMA, MID/MIDI, OGG, AAC, etc.
- Video(12): AVI, MOV, MP4, M4V, 3GP, 3G2, WMV, ASF, FLV, SWF, MPG, RM/RMVB, etc.
- Email(12): PST, DBX, EMLX, etc.
- Document(8): DOC/DOCX, XLS/XLSX, PPT/PPTX, PDF, CWK, HTML/HTM, INDD, EPS, etc.
- Others(3): ZIP, RAR, SIT, and other useful data.
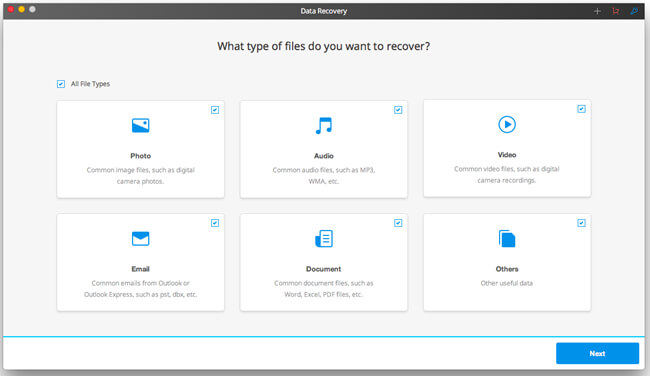
Step 1. Get Down to Data Recovery
To begin with, Data Recovery for Mac must be installed. After you launch it, you'll be asked to select types of files you want to recover with six tabs available. Then, click "Next" to proceed.
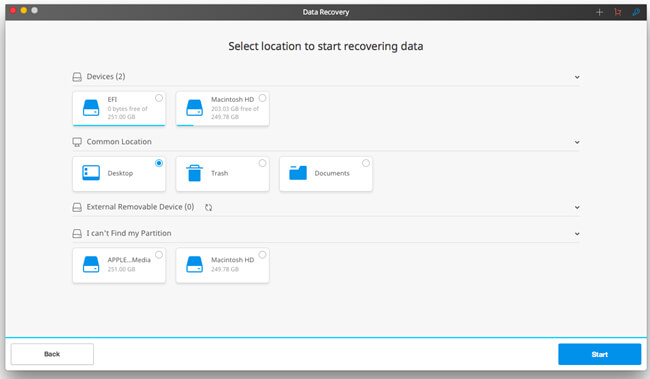
Step 2. Locate the Disk
This step requires you to select the target disk to start scanning for selected types of data. The default scan mode is "Quick Scan", and you can switch to "Deep Scan" as to perform a thorough scanning later on.
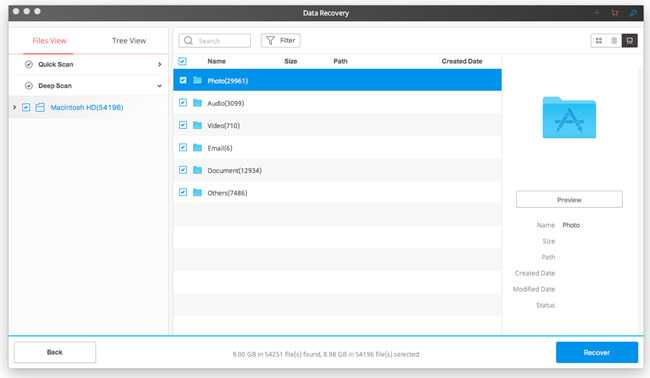
Step 3. Restore Lost Files
Since it's scanning a whole drive, it may take quite a time according to how much data there were. When the scanning is done, you can preview all files found via Data Recovery and select desired files to "Recover" to your Mac.
Time Machine enables to keep all files safe with your external storage solution or external hard disk drive. However, somehow it happens that a few files will fail to back up. Therefore, you'd better make an extra backup for significant files alone.
