In the past, we would write down to mark some important items, for example, the names, phone numbers, addresses, etc. in order to keep in touch with others. However, this habit seems to fade away day by day, especially as the development of the technology. You can notice that the people tend to take notes to remember the information on the device now since it is easy to mark and can keep the details forever only if not deleting them. Therefore, contact app on the device allows users to save friends' names, phone numbers, addresses, birthday, company and so on. Just enter someone's name card, and you can contact him/her right now. Nevertheless, is it 100% safe? Maybe not, because sometime the phone data may get lost mistakenly, so how to regain the vital phone numbers on Samsung Galaxy mobile?
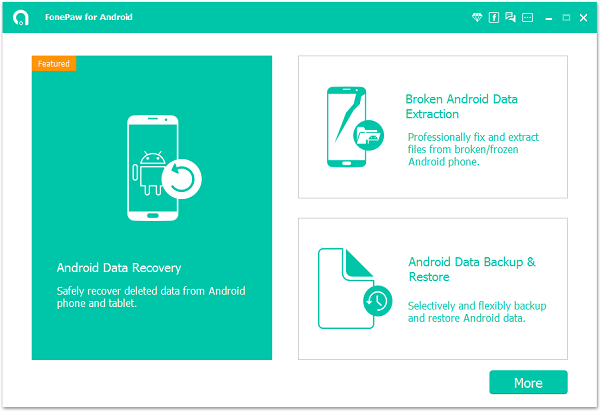
Samsung Data Recovery is conducive to recovering the contacts, including all details that you have inputted on the phone or tablet. Frankly, before going to use this recovery tool, you'd better stop using the device lest data would be overwritten. At this time, your lost photos, videos, messages, contacts, music can be retrieved from Galaxy S7/S6/S6 Edge/Note/Alpha.
The download icon below allows you to have the free trial to regain your deleted data.
Galaxy Phone Number Recovery with Several Clicks
Step 1. Get Samsung Data Recovery on the PC. After you have installed this software on the personal computer, you should go to run it and connect your phone to this PC with a proper USB cable.
Note: A proper USB line is necessary because some users used the klunky cable to try, it will fail in connecting.
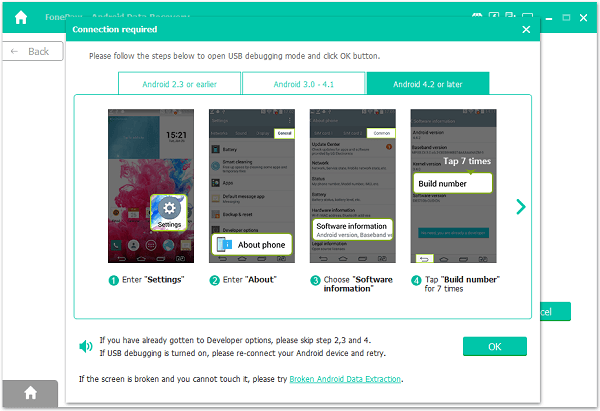
Step 2. Allow USB Debugging on the Galaxy Mobile. Based on the distinguished Android versions, there are not only one way to enable USB debugging mode on the computer. The detailed operation is listed below.
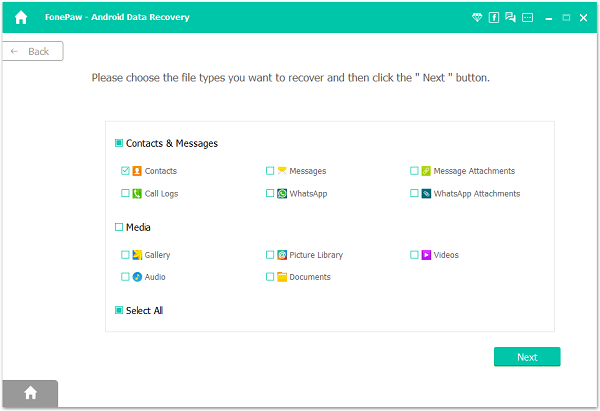
Step 3. Put Certain Data into Scanning. The following interface will ask you to select a kind of files, such "Contacts", so tick the box in front of it and press "Next" button.
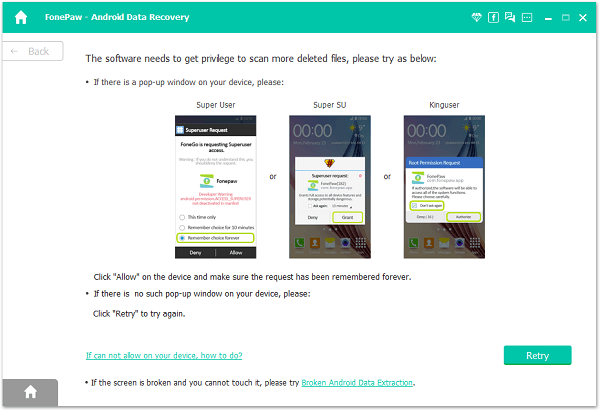
Step 4. Pass the Request on the Device. When the pop-up comes out on the Samsung Galaxy S7/S6/S6 Edge, tap the "Allow" option which may require you to tap after several seconds, so be patient. Then, this interface on the PC will skip automatically.
Step 5. Scan the Selective Files. In this way, you are allowed to preview the scanned results on the window but if you have selected certain data before, it will just present only the selected files. Click some contacts on the list to check whether it is what you are eager to. Finally, press "Recover" to save the files on a folder.

Step 6. Regain your Lost Items. Whether move to check the recovered results or not is up to you. Open the folder that you have chosen before so that you can view three kinds of formats saving the phone numbers.
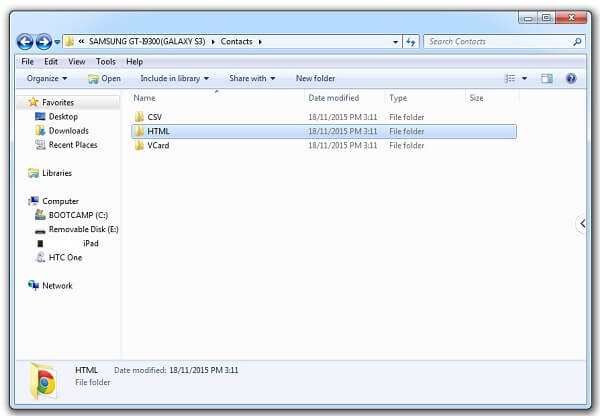
The contacts are presented as vCard, CSV, HTML on the PC/Mac. If you tend to view the files, HTML and vCard are suggested to view, and CSV is practical to be imported to another device. Besides, you are allowed to transfer those contacts from PC to Samsung with Android Manager, so the phone numbers are back.
