Are you tired of default ringtones within your Android/iPhone? Do you want to make your personal ringtone? Sometimes, one came across a nice song and thought that it's cool to make it his exclusive ringtone. Believe me. You are far from alone. So, how to DIY custom ringtones indeed? There is the easiest way to go on WindowsPC. Interested? Scroll down and check it out!
People Also Read:
● How to Transfer Songs among iOS, Android, and PC?
● How to Download Music for Free and Listen to Songs Offline?
That is Android Transfer - TunesGo. You may hear of this software as an Android/iOS file manager. Indeed, it is far capable than this. Except for transferring/managing various types of data, Android Transfer - TunesGo comes with quite a few features, of which one is Ringtone Maker for iPhone and Android. Now, let's see how it works.
Part 1: How to Make Personal Ringtones Via Ringtone Maker?
The pity is that Ringtone Maker is currently only available on Win version of Android Transfer - TunesGo for Win 10/8/7/XP. However, I believe it'll be supporting Mac computer very soon.
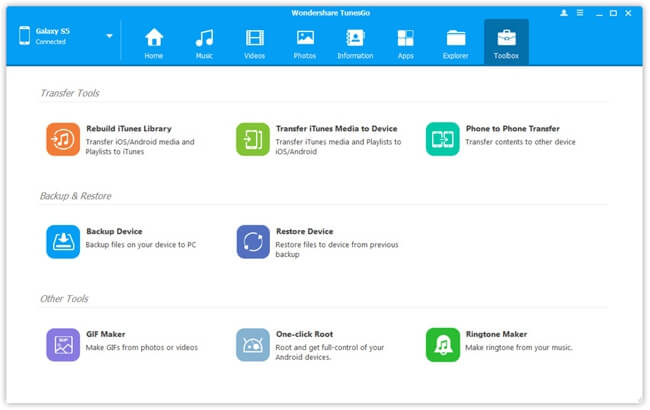
Step 1. Launch Ringtone Maker for Android/iPhone.
To enjoy the convenience, you should download Android Transfer - TunesGo at first and connect your Android/iPhone to the software. Then, go to "Toolbox" and select "Ringtone Maker" on the lower right.
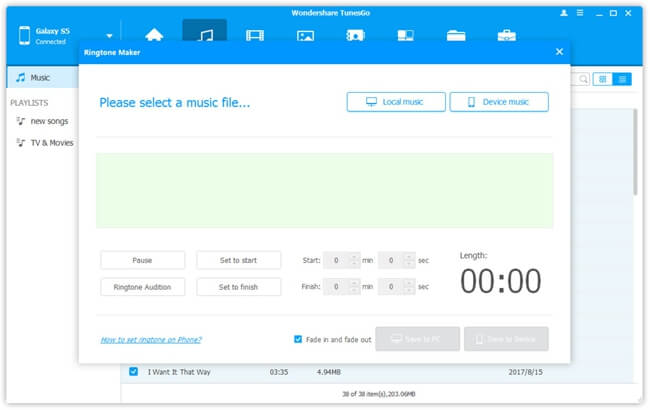
Step 2. Make A Ringtone Out of A Song
Now, a window pops up asking you to select a music file from "Local music" or "Device music". Please choose a desired song in the first place.
The song will be presented as a sound spectrum. Please set the "Start" time and "Finish" time to limit a certain melody. The selected duration will be shown in a blue area. The music plays as the red line goes.
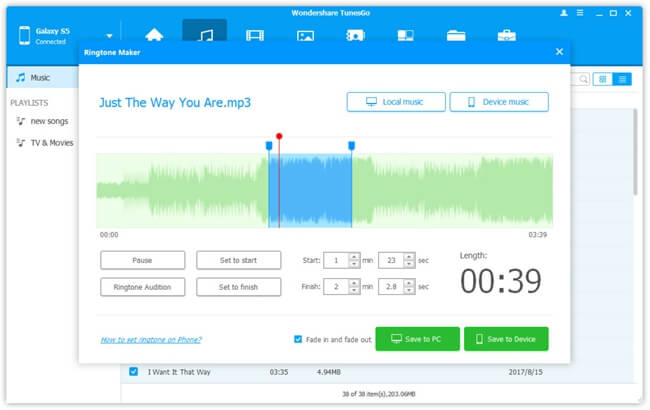
Step 3. Save the Ringtone to PC/Device
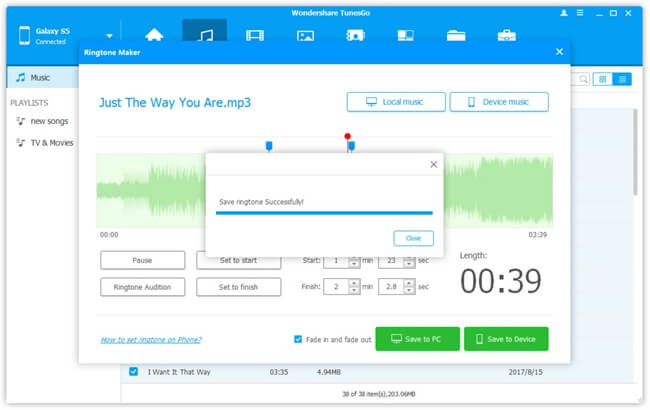
Android Transfer - TunesGo allows users to either "Save to PC" or "Save to Device". To directly set your creation as the ringtone, it's recommended to click on "Save to Device" option. The process completes in no time and then you'll be prompted with a message saying that "Save ringtone successfully!"
Part 2: How to Set Your Own Ringtones on Android/iPhone?
After done making the exclusive ringtone, probably you cannot wait to set it as the ringtone on your phone right now. However, the way to set ringtones varies from device to device. Here, I introduce the way on Samsung and iPhone as examples.
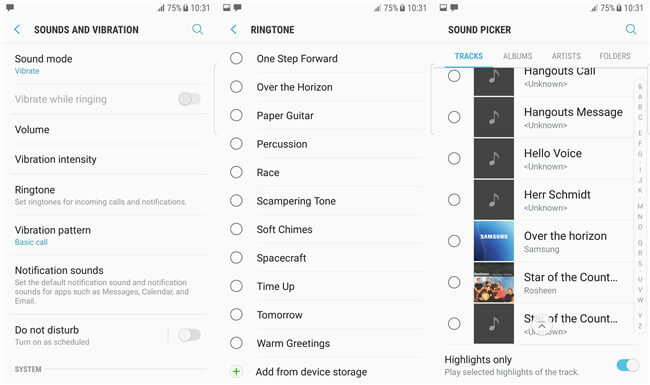
How to Change Ringtone on Samsung?
Now, let me take the tutorial on Samsung Galaxy S7 edge as an example. Please check out the following steps.
Step 1. Launch "Settings" app.
Step 2. Tap on "Sounds and vibration" option.
Step 3. Select "Ringtone" settings and tap on "Ringtone" again.
Step 4. Scroll down to the bottom and select "Add from device storage".
Step 5. Choose "Media storage" and select the DIY ringtone to set up.
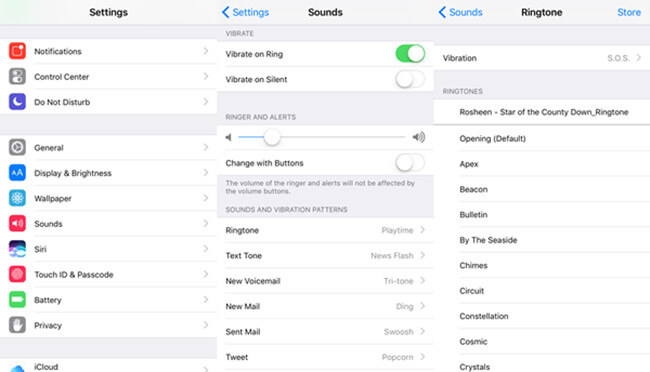
How to Change Ringtone on iPhone?
It's more difficult to make personal ringtone with iOS devices, however, you can have this done easily with Ringtone Maker. Then, you can set your ringtone on iPhone with ease.
Step 1. Open "Settings" app.
Step 2. Swipe to "Sounds" option.
Step 3. Select "Ringtone".
Step 4. The custom ringtone is listed above. Please select it and tap on "Store".
Isn't it cool to have your custom ringtone? I'm sure your ringtone will amaze others for sure. To recommend this awesome tool to your friends is also a good way to improve your taste!
